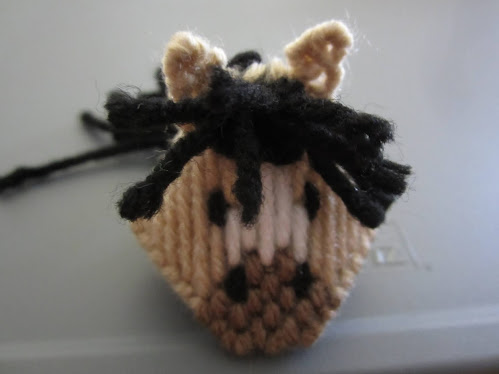
Thanks to Sandi Hamilton on Facebook for the inspiration.
The horse is harder to do than many of the others and has a lot of detail. For an easier horse stitch the face as is and do long stitches for the rest. Skip the mane, tail, and hooves.
Cut one piece of plastic canvas 13 by 13 holes and two pices 10 by 10 holes.
Trim the pieces to look like this. All three are different.
Stitch the face to look like this. The unworked stitches are where the forelock will go.
The forelock, mane and tail are done the same way as on my Wild Thing Kiss Character.
Cut 5 lengths of yarn for the forelock, I cut them about 8 inches long. Do not trim the ends until after the character is sewn together. Longer ends are easier to hold out of the way when stitching it up.
Do the mane and tail next. The mane is three lengths of yarn and the tail is four lengths.
The mane starts at the very top of the back of the head and the first yarn piece covers the edge of the head.
The tail is near the bottom. Here is how to place them. This is the view from the wrong side.
This is the view from the right side. Do not trim the mane until after the Kiss Character is sewn together.
After the mane and tail are in place, use long stitches to cover the rest of the back.
On the bottom of the horse use all little stitches. Don't forget to do the mouth edge.
After the bottom is stitched, use hoof color to stitch the hooves in place on top of the stitches that are already there. It will look like this when done.
Here is what the hoof stitches look like. Do the background first, this is just to help place them.
When all three pieces are complete, sew the Kiss Character together and then trim the forelock and mane to desired length.


